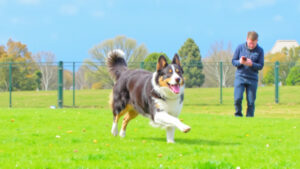
A dog training collar works only as well as the person holding the remote. Used correctly, it becomes a clear communication channel between you and your dog – a way to reinforce commands at a distance, teach boundary awareness, and build reliable recall in environments where a leash cannot reach. Used incorrectly, any training collar can create confusion, fear, and behavioral problems that are harder to fix than the ones you started with.
This guide walks you through the complete process: choosing and fitting the collar, finding the right stimulation level for your dog, conditioning your dog to wear it, and then using it to teach the four foundational commands – sit, come, stay, and heel. Every step prioritizes safety and humane handling, because the goal of a training collar is to communicate with your dog, not to punish them.
Whether you are working with a standard remote training collar, a modern smart collar with GPS and boundary features, or a vibration-only device, the methodology below applies. The tools differ, but the principles of timing, consistency, and positive reinforcement remain the same.
What Is a Dog Training Collar?
A dog training collar is a collar equipped with feedback mechanisms – such as tones, vibrations, or low-level static stimulation – that help a handler communicate with a dog during behavior training. Unlike a standard flat collar used for identification, a training collar delivers cues the dog can associate with specific commands, boundary limits, or behavioral corrections.
Training collars are not designed for continuous, unsupervised wear. They are active tools used during structured training sessions and supervised outdoor time, then removed. The feedback they provide is intended to get a dog’s attention and redirect behavior – not to cause pain or fear.
Modern training collars range from simple mechanical devices (martingale collars, head halters) to electronic remote collars with adjustable stimulation levels, to GPS-enabled smart collars that combine training feedback with virtual fence boundaries and location tracking.
→ For a full breakdown of every collar type, see our guide to different types of dog collars.
What Types of Training Collars Can You Use?
Training collars fall into two broad categories based on how they deliver feedback to the dog.
Mechanical Training Collars
Mechanical training collars use physical tension or pressure as a communication signal. Martingale collars tighten gently when the dog pulls, then release when tension stops. Head collars redirect the dog’s nose toward the handler when they pull forward. Prong collars distribute pressure around the neck through blunt metal links. Each operates without batteries or electronics and relies entirely on the handler’s leash technique and timing.
Mechanical collars are best suited for leash-based training: teaching a dog to walk without pulling, preventing escape from a collar, and giving the handler physical control over a strong dog. They are not effective for distance training or off-leash work because they require a physical connection between handler and dog.
Electronic and Smart Training Collars
Electronic training collars deliver handler-controlled feedback through contact points on the collar. Modern models offer three feedback modes: audible tones, vibration, and adjustable static stimulation ranging from imperceptible to attention-getting. The handler operates the collar with a handheld remote transmitter, selecting the type and intensity of cue in real time.
Smart training collars, such as the Halo Collar, extend this functionality by adding GPS-based virtual fencing, real-time location tracking, and app-controlled training programs. The collar can deliver automated boundary feedback when the dog approaches a virtual fence line, in addition to manual training cues controlled by the owner.
Electronic and smart collars are the primary focus of this guide, since they require the most careful setup, conditioning, and technique to use safely and effectively.
How Do You Set Up a Dog Training Collar?
Proper setup determines whether the collar works as a precise communication tool or a source of confusion. Two things must be right before any training begins: the physical fit of the collar on your dog’s neck, and the stimulation level that matches your dog’s individual sensitivity.
How Should a Training Collar Fit?
A training collar should sit high on the dog’s neck, just below the jawline and behind the ears. This is the most sensitive area and ensures consistent contact between the collar’s contact points and the dog’s skin.
The collar should be snug enough that the contact points maintain skin contact when the dog moves, but not so tight that it causes pressure marks or restricts breathing. The standard test: you should be able to slide one finger (not two, as with a flat collar) between the contact points and the skin. If the collar rotates freely around the neck or slides down toward the shoulders, it is too loose and will deliver inconsistent feedback.
For dogs with thick or long coats, you may need longer contact points to ensure the signal reaches the skin through the fur. Most quality e-collar manufacturers include both short and long contact points in the box.
To measure your dog’s neck, wrap a flexible tape measure snugly around the neck at the high position described above. The measurement in inches (or centimeters) determines which collar size or strap length you need. Most electronic collars fit neck sizes from 8 to 30 inches (20 to 76 cm).
How Do You Find Your Dog’s Working Level?
The working level – also called the recognition level – is the lowest stimulation setting at which your dog shows a subtle, visible reaction to the collar’s signal. This is the foundation of humane e-collar training. Every dog has a different working level, and finding it correctly prevents both under-stimulation (dog ignores the cue) and over-stimulation (dog panics or shuts down).
Follow this process to find your dog’s working level:
- Take your dog to a quiet, familiar environment with minimal distractions. The dog should be calm and relaxed – not mid-play or mid-meal.
- Set the collar to the lowest available stimulation level.
- Press the stimulation button briefly (a “nick” or momentary tap, not continuous).
- Watch for a subtle reaction: a slight ear flick, a small head tilt, a brief pause, or a gentle turn toward you. Any of these indicates the dog felt the cue.
- If there is no visible reaction, increase the level by one increment and repeat.
- The first level at which you see a subtle reaction is your dog’s working level. Mark it or note it.
The correct reaction is subtle. If the dog yelps, flinches hard, tries to bolt, or tucks its tail, you have gone too high. Drop back several levels immediately. A dog’s working level may change depending on the environment (higher distractions may require a slightly higher level) and the dog’s state of arousal. Recheck periodically.
Quote: “I spend more time on this step than any other in the entire protocol – and most owners want to rush past it in 30 seconds. The working level isn’t a number you find once. It shifts with the environment, the dog’s arousal, even the time of day. A level 8 in your quiet living room might be a level 12 at the dog park. If you’re not rechecking, you’re either under-communicating or overcorrecting, and the dog has no way to tell you which one except through behavior you’ll misread as disobedience.”
How Do You Introduce a Dog to a Training Collar?
Collar conditioning is the process of teaching your dog that the training collar is a neutral object – not a trigger for anxiety. Dogs that associate the collar with immediate correction become “collar-wise”: they behave only when the collar is on and revert to old habits the moment it comes off.
To prevent this, follow a 5-to-7-day conditioning period before activating any training features:
- Have your dog wear the training collar during positive daily activities – meals, play sessions, walks, affection time. Do not activate any tones, vibrations, or stimulation during this period.
- Put the collar on 30 to 60 minutes before you plan to train, so the act of putting on the collar does not predict the start of correction. Take it off well after training ends.
- Vary when and how long the collar stays on. The goal is to make the collar as unremarkable as a leash or harness.
Once your dog shows no reaction to wearing the collar – no scratching at it, no freezing, no behavioral change when it goes on or comes off – the conditioning period is complete and you can begin active training.
How Do You Train a Dog Using a Training Collar?
A training collar reinforces commands your dog already understands at a basic level. It does not teach new commands from scratch. Before using an electronic collar for any command, your dog should first learn that command through leash guidance, hand signals, treats, and verbal praise. The collar then becomes a way to extend communication beyond leash range – an “invisible leash” that works at 50 to 1,000+ feet.
For each command below, the process follows the same pattern:
- Give the verbal command.
- If the dog responds correctly, praise and reward immediately. No collar cue is needed.
- If the dog does not respond within 2 to 3 seconds, activate a brief stimulation at the working level simultaneously with a gentle leash guide or hand signal.
- The instant the dog begins to comply, release the stimulation and praise enthusiastically.
- The dog learns: command → response → praise. The collar cue bridges the gap when the dog is distracted or at a distance.
Teaching Sit
- Stand in front of your dog with a treat in one hand and the remote in the other.
- Say “sit” in a clear, calm voice.
- If the dog sits, reward with the treat and verbal praise. No collar activation needed.
- If the dog does not sit within 2–3 seconds, activate a brief nick at the working level while using your free hand to guide the dog’s hindquarters gently into the sitting position.
- Release the stimulation the instant the dog’s hind touches the ground. Praise and treat immediately.
- Repeat 5 to 10 times per session, keeping sessions under 15 minutes. End on a successful repetition.
Teaching Come (Recall)
Reliable recall is the single most important safety command for any dog, and it is the primary reason most trainers recommend electronic collars. A dog that comes when called – every time, regardless of distraction – is a dog that can safely enjoy off-leash freedom.
- Begin indoors or in a fenced yard with a long training lead (15 to 30 feet) attached to a separate flat collar.
- Allow the dog to move away from you. When the dog is facing away or distracted, say “come” in a clear, upbeat voice.
- If the dog turns and moves toward you, praise as they approach and reward when they arrive.
- If the dog does not respond, activate a brief nick at the working level while gently guiding the dog toward you with the long lead.
- Release the stimulation the moment the dog turns toward you. Continue praising as they approach.
- Gradually increase the distance, distractions, and eventually remove the long lead as the dog demonstrates consistent recall.
Teaching Stay
- Command your dog to sit.
- Hold your palm facing the dog and say “stay” firmly.
- Take one step backward. If the dog holds position for 3 to 5 seconds, return and reward.
- If the dog breaks position, activate a brief nick while guiding them back to the original spot. Repeat the “stay” command.
- Gradually increase the distance between you and the dog, and the duration of the stay, over multiple sessions.
Teaching Heel
- Begin walking with your dog on a standard leash, collar set to working level.
- Say “heel” and begin walking. The dog should walk beside you with a loose leash, neither pulling ahead nor lagging behind.
- If the dog surges ahead, activate a brief nick and change direction. The dog learns that pulling forward produces an interruption, while walking beside you produces praise and treats.
- If the dog lags behind, use an encouraging tone and a treat to motivate forward movement. Do not use stimulation to push a dog forward – stimulation is an interrupter, not a motivator.
- Practice in short sessions of 10 to 15 minutes across progressively busier environments.
What Are Common Mistakes When Using a Training Collar?
Most training collar problems are handler errors, not equipment failures. These are the most frequent mistakes and how to avoid them:
- Starting too high. Using a stimulation level above the dog’s working level startles or frightens the dog, creating negative associations with the collar and with you. Always start at the lowest level and work up incrementally.
- Using the collar before the dog knows the command. If a dog has never learned “come” through leash work and rewards, activating stimulation when it doesn’t respond is confusing, not corrective. Teach the command without electronics first.
- Poor timing. A correction delivered more than 2 to 3 seconds after the behavior is meaningless to the dog. The dog cannot connect a late cue to the action that triggered it. Stimulation must be immediate and brief.
- Holding the button too long. Continuous stimulation confuses the dog because there is no clear start and end point. Use a momentary nick (a quick tap), not a sustained press.
- Using the collar as punishment. Stimulation should interrupt and redirect, never punish. If you find yourself using the collar out of frustration, stop the session. An angry correction damages the dog’s trust and worsens the behavior you’re trying to fix.
- Leaving the collar on unsupervised. Contact points pressed against the skin for extended periods can cause pressure sores. Remove the training collar when training is over and limit continuous wear to 8 to 12 hours maximum per day.
- Skipping the conditioning period. Activating the collar the first time the dog wears it creates a powerful negative association. The 5–7 day conditioning process is not optional.
What Safety Precautions Should You Follow?
Every training collar – mechanical or electronic – carries risk when misused. Following these guidelines minimizes that risk:
- Always keep an electronic collar at the lowest effective setting. If you cannot see any reaction at the current level, increase by one increment. If the dog shows distress, drop back immediately.
- Corrections should produce only a subtle, brief reaction – an ear flick, a head turn, a momentary pause. If you see yelping, cowering, tail tucking, freezing, or aggression, the level is too high or the approach is wrong.
- Never use an electronic collar on a dog under 5 months old. Young puppies lack the cognitive development to understand cause-and-effect correction.
- Check the contact point area daily for redness, irritation, or pressure sores. Rotate the collar’s position slightly each time you put it on.
- End every training session on a positive note. The last interaction the dog remembers should be success, praise, and reward – not correction.
- If your dog shows persistent fear, aggression, or shutdown in response to the collar despite being used at the lowest level, stop and consult a certified professional dog trainer or veterinary behaviorist.
Is a Training Collar the Same as a Shock Collar?
No. A modern electronic training collar is not the same device as the “shock collars” that earned a reputation for harsh, painful correction in earlier decades.
Traditional shock collars delivered a limited range of high-intensity electrical stimulation, often with little user control over the level. They were frequently used as punishment – a painful consequence applied after unwanted behavior – rather than as a communication tool. When used this way, shock collars can increase fear and anxiety, damage the bond between dog and owner, create new behavioral problems including redirected aggression, and, in extreme cases, cause physical burns at the contact site.
Modern electronic training collars operate differently in three critical ways:
- Adjustable intensity: Professional-grade models offer 100+ individually selectable stimulation levels, with the lowest levels producing a sensation most humans cannot even feel on their own skin. The handler selects the precise level that matches the dog’s sensitivity.
- Multiple feedback modes: Most modern collars include tone, vibration, and static options. Many dogs respond to tone or vibration alone, making static stimulation unnecessary.
- Communication, not punishment: The collar cue is paired with a known command and delivered at the moment of non-compliance – not after the fact. The dog learns to associate the subtle cue with the command, and the cue fades as the dog’s response becomes reliable.
The Halo Collar takes this evolution further by using customizable sound, gentle haptic vibration, and adjustable static as a feedback system designed to guide rather than punish. Halo’s patented Direction-Based Feedback responds only when your dog moves toward a boundary – not when standing still or walking parallel to it – and escalates gradually through warning, boundary, and emergency cues. Its positive reinforcement cues (whistle, “good dog” tone, and come-home signal) actively reward your dog for turning away from the boundary – something no traditional shock collar was ever designed to do.
When Should You Stop Using a Training Collar?
A training collar is a temporary tool, not a permanent fixture. The goal of collar-based training is to reach a point where the dog responds to verbal commands alone, without needing the collar’s cue to comply.
Signs your dog is ready to graduate from the training collar:
- The dog responds to verbal commands consistently – at least 8 out of 10 repetitions – across multiple environments and distraction levels.
- You have not needed to activate the collar in the past 2 to 3 weeks of regular use.
- The dog’s behavior is the same whether the collar is on or off.
To wean off the collar, first reduce the stimulation level to the lowest setting and rely primarily on tone or vibration for any needed cues. Then transition to wearing the collar without using it at all, allowing the dog to demonstrate compliance on their own. Finally, remove the collar entirely during supervised sessions and observe whether the dog maintains the behaviors without it.
If the dog regresses, return to the previous stage for another 1 to 2 weeks before attempting the transition again. Regression is a normal part of learning – not a failure.
Note: GPS fence collars like the Halo Collar are an exception to the weaning model, because the collar serves a containment function (virtual boundary enforcement) that requires continuous wear in addition to its training role. In this case, the training cues may phase out while the boundary management continues.
How Does the Halo Collar Work as a Training Tool?
The Halo Collar, designed in partnership with Cesar Millan, integrates training collar functionality with GPS virtual fencing and real-time location tracking in a single device. It is built around a principle Cesar calls “guidance over correction”: the collar teaches your dog where it is safe to go, rather than punishing the dog for going somewhere wrong.
The Halo system includes a structured training program built into the companion app, based on Cesar Millan’s training methodology. The program walks you through the complete process of conditioning your dog to the collar, introducing virtual fence boundaries, and reinforcing recall and stay commands – with video instruction for each step.
What distinguishes Halo from a standard remote training collar:
- Direction-Based Feedback: The collar reads which direction your dog is heading and delivers escalating cues (sound → vibration → optional static) only when your dog moves toward a GPS fence boundary – not when standing still or moving parallel. No button press required.
- Positive reinforcement cues: The collar actively rewards your dog for turning away from the boundary with a whistle, “good dog” tone, or come-home signal – reinforcing the right behavior, not just interrupting the wrong one.
- Portable containment: Virtual fences created through the Halo app travel with the collar. The same system works at home, at a campsite, or at a relative’s unfenced property.
- Activity and health monitoring: Halo Health tracks daily activity, sleep, rest, and walk data, giving you visibility into your dog’s wellbeing alongside training progress.
For owners who want training collar functionality, GPS tracking, and virtual fence containment in one device – with a professional training program to guide them through the process – the Halo Collar is designed to be that all-in-one solution.
Dog Training Collar FAQs
Is the Halo Collar a shock collar?
No. The Halo Collar is not a shock collar. It uses customizable feedback options – including sound, gentle haptic vibration, and adjustable static – as part of a graduated feedback system. Its patented Direction-Based Feedback responds only when your dog moves toward a boundary, not when standing still or walking parallel to it. Most owners work at very low levels or rely primarily on audible cues once the dog understands the rules. The system is built around teaching safe boundaries and recall through graduated, humane feedback, not punishing mistakes.
At what age can I start using a training collar?
Basic flat collars for identification can be used on puppies as soon as they come home. For electronic or smart training collars, most trainers recommend waiting until the dog is at least 5 to 6 months old – old enough to understand basic commands and physically mature enough to wear the equipment comfortably. Always follow your veterinarian’s and trainer’s guidance for your specific breed.
How do I know if the collar level is too high?
If your dog yelps, flinches dramatically, tries to escape, cowers, tucks their tail, or refuses to move, the level is too high. The correct reaction at the working level is subtle: a quick ear flick, a slight head turn, or a brief pause. Start at the lowest setting and increase by one increment at a time until you see that minimal response.
Can training collars cause long-term harm?
Used incorrectly – especially at high levels, with poor timing, or as constant punishment – training collars can damage a dog’s trust and emotional wellbeing. Used correctly, at low levels, and as part of a balanced training approach with positive reinforcement, modern training collars are designed to be a safe communication tool. If you are unsure about using one, consult a certified professional trainer before starting.